Connect Exness by URL in Claude
Connect Claude directly to the Exness MCP server using a custom connector, then authorize access to your Exness account. Follow the steps below for Claude or use the command-line setup for Claude Code.
Connect directly in Claude
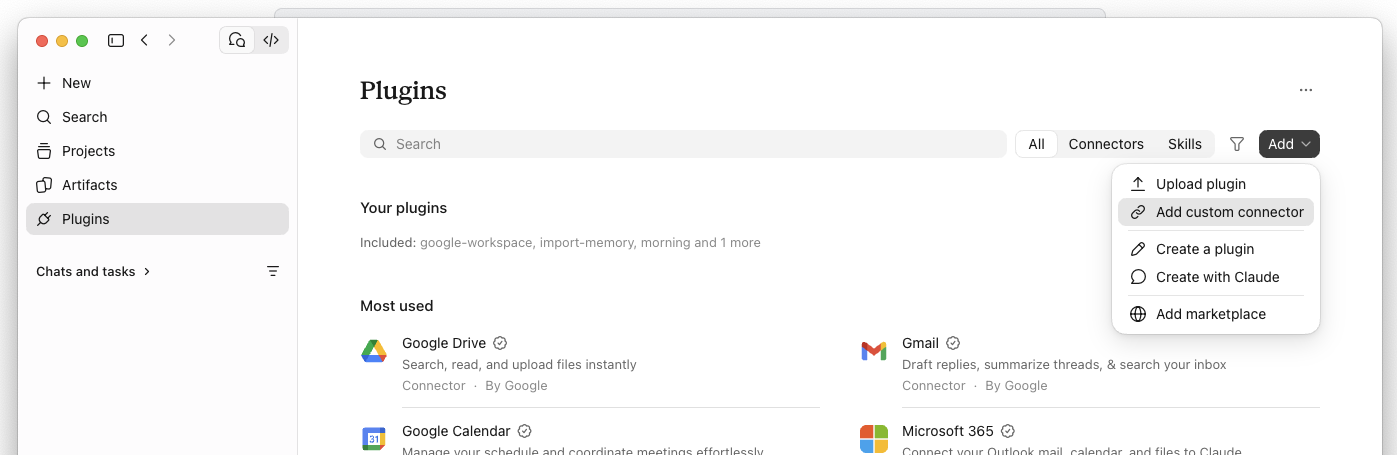
1. Add a custom connector. Open Plugins, then choose Add → Add custom connector.
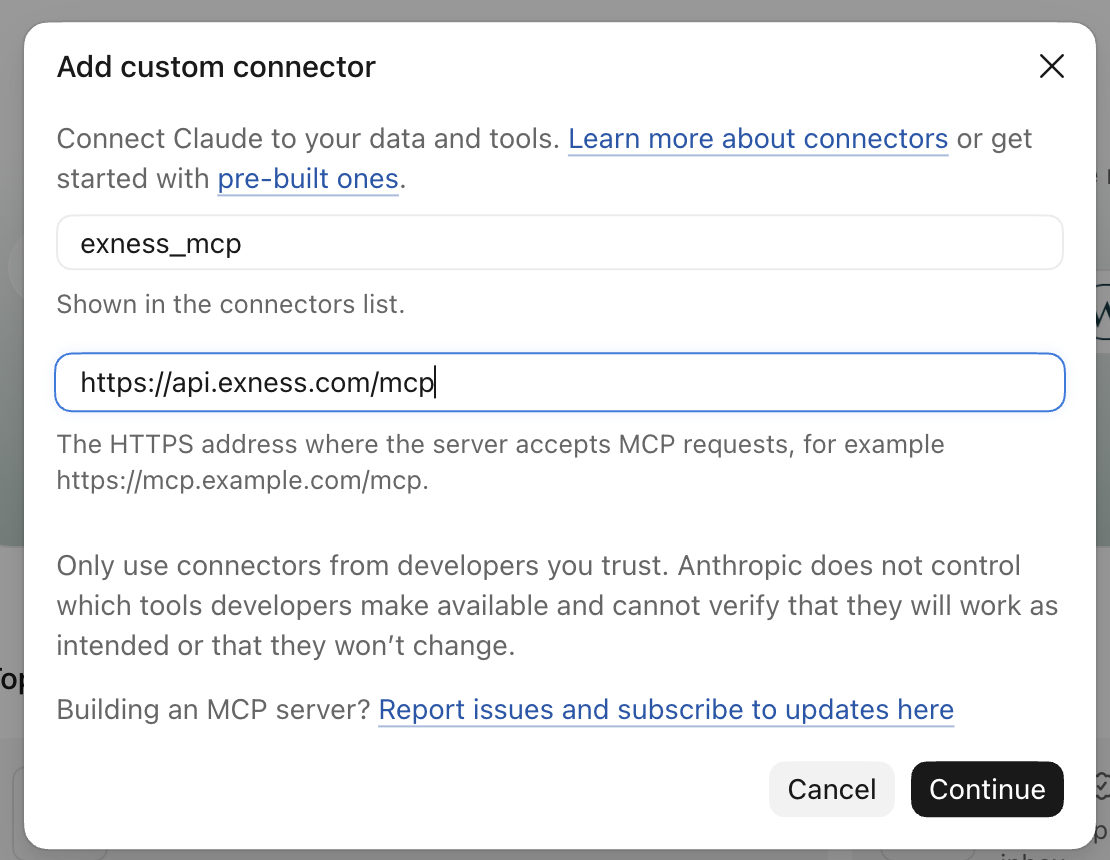
2. Enter the Exness URL. Name the connector and enter https://api.exness.com/mcp. Select Continue.
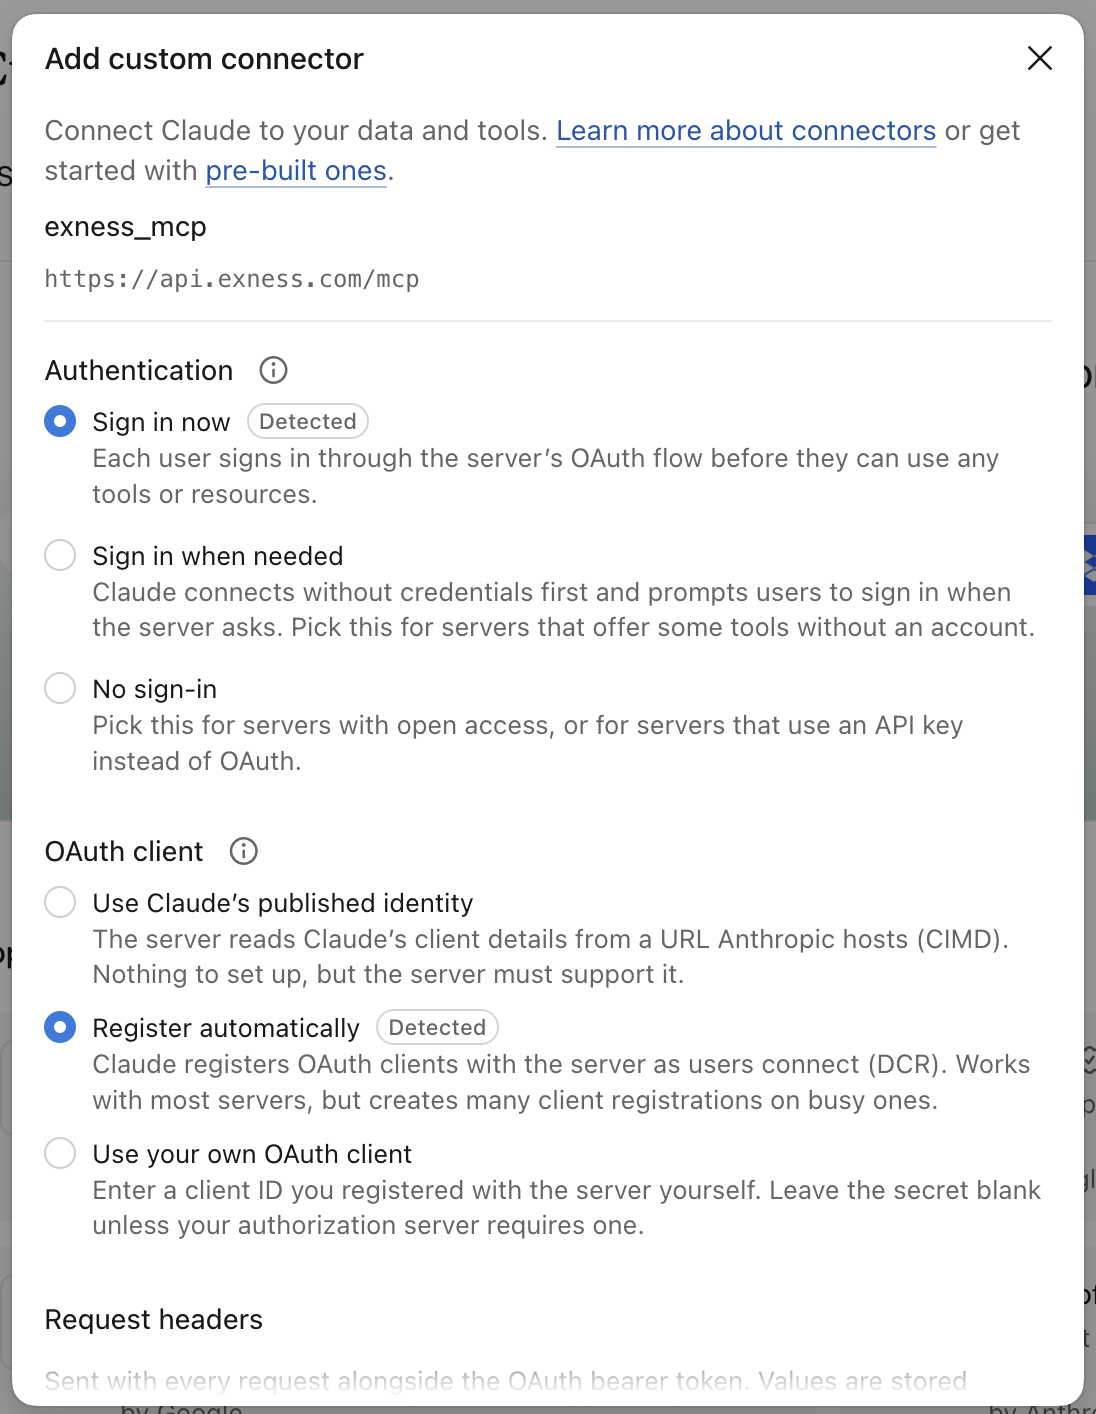
3. Complete connector setup. Claude detects Sign in now and Register automatically for this URL. Review the options and select Add.
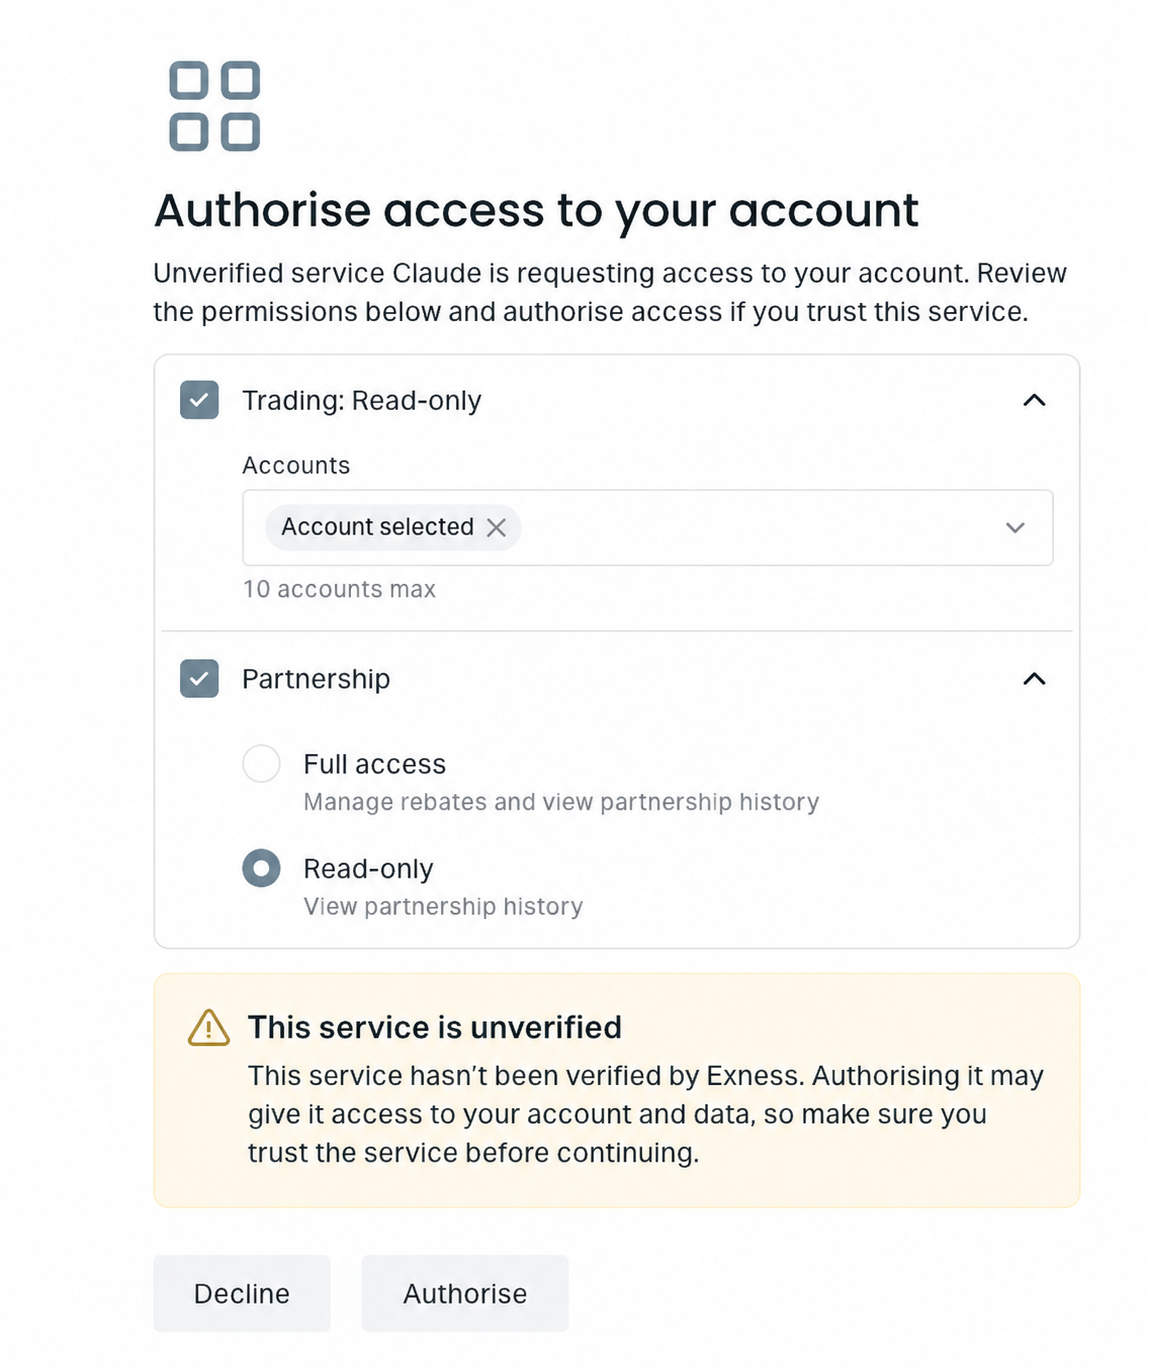
4. Authorize account access. If you are not signed in to your Exness Personal Area, sign in as usual when prompted. On the Exness authorization page, choose the Trading accounts and Partnership access you need, then select Authorise.
Connect from Claude Code
If you use Claude Code in a terminal, you can connect to Exness with commands. You need Claude Code installed and available as claude.
1. Add the Exness MCP server. From your project directory, run:
claude mcp add --transport http exness https://api.exness.com/mcp
2. Authorize account access. Start Claude Code in the same directory with claude, then enter /mcp. Select exness and follow the authentication prompt to open the browser flow.
Sign in to your Exness Personal Area if prompted, then choose the Trading accounts and Partnership access you need and authorize the connection. Return to Claude Code when you finish.
3. Check the connection. Use /mcp in Claude Code to check the server's status. You can also list your configured servers from the terminal:
claude mcp list
Then ask Claude Code which Exness tools it can use. See the Claude Code MCP guide for more configuration options.
If you need help, see Troubleshooting.